Understanding Roofing Repair Service Saint Michael Minnesota: Everything You Need to Know

Worker hands installing bitumen roof shingles with air hammer and nail Aerial view in worker hands installing bitumen roof shingles with air hammer and nail roofing contractors stock pictures, royalty-free photos & images

Roof replacement is a critical home improvement project that ensures your property remains safe, energy-efficient, and structurally sound. If you’re unfamiliar with the process, understanding the basics can help you make informed decisions about your roof and its maintenance. Below, we break down the essential aspects of roof replacement.

What Is Roof Replacement?

Roof replacement involves removing your existing roof system down to its decking (in most cases) and installing a new one. This process restores the integrity of your roofing system while addressing potential structural issues. It differs from repairs, which only target specific sections of damage.

  • Removing old shingles or roofing materials
  • Inspecting the underlying decking for damage
  • Repairing or replacing any compromised sections
  • Installing underlayment for added protection
  • Placing new roofing materials such as shingles, tiles, or metal panels
  • Finishing touches like ridge caps, flashing, and ventilation components

When Is Roof Replacement Necessary?

  1. Widespread leaks or water infiltration
  2. Warped or sagging decks due to structural issues or rot
  3. Asphalt shingles typically last 20–30 years
  4. Metal roofs may last 40–70 years
  5. Recurring leaks despite repeated repairs
  6. High energy bills due to poor insulation caused by roofing problems

Benefits of Roof Replacement

  1. Improved Safety: A new roof eliminates risks like collapse or further water damage.
  2. Energy Efficiency: Modern roofing systems better regulate indoor temperatures and reduce energy costs.
  3. Increased Property Value: A durable and aesthetically pleasing roof enhances curb appeal and boosts resale value.
  4. Long-Term Savings: While an upfront investment, a new roof minimizes future repair expenses.

The Role of Professional Roofers in Replacements

Aspect Professional Roofers DIY Approach
Expertise In-depth knowledge of materials and methods Limited experience
Time Efficiency Faster completion with specialized tools Longer duration due to learning curves
Warranty/Guarantee Workmanship warranties provided No guarantees on DIY results
Safety Adherence to safety standards Risk of accidents without proper training

Questions to Ask Before Starting a Roof Replacement Project

  1. What type of material is best suited for my climate?
  2. Are there any local building codes I should be aware of?
  3. Does my homeowner’s insurance cover part of the costs?
  4. How long will the project take from start to finish?

By understanding these basics, you’ll be prepared to handle this essential home improvement task with confidence and clarity.

Top Reasons to Call Roofing Contractors Saint Michael Minnesota for a New Roof Replacement

Identifying when your roof needs replacement is essential for maintaining the safety and structural integrity of your home. Overlooking the warning signs could lead to costly repairs, water damage, or even health hazards such as mold. Here are some of the most critical indicators that it’s time to consider a new roof replacement.

Finding an Expert Roofing Repair Company in Saint Michael Minnesota for Aging Roofs

The lifespan of a roof largely depends on its material:
| Roofing Material | Expected Lifespan | |—————————|—————————| | Asphalt Shingles | 20-30 years | | Metal Roofing | 40-70 years | | Wood Shakes and Shingles | 25-30 years | | Clay or Concrete Tiles | 50+ years |

If your roof has outlived its typical lifespan, replacement should be on your radar regardless of visible damage.

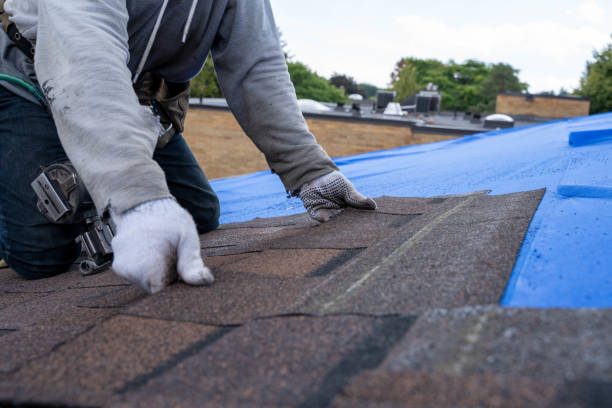
Signs You Need a Roofing Company Saint Michael Minnesota: Curling, Cracked, or Missing Shingles

Shingles are your roof’s first line of defense against weather elements. If you notice:
Curling edges: Indicates shingles have aged or been exposed to moisture over time.
Cracks: Often caused by prolonged sun exposure or heavy impacts from hailstorms. – Missing shingles: Exposes the underlayment and increases vulnerability to leaks.

These issues compromise the integrity of your roof and leave it susceptible to additional damage.

Signs You Need a Roofing Service Saint Michael Minnesota: Water Damage and Leaks

Signs of water intrusion include:
– Stains on walls or ceilings.
– Sagging areas in the attic or ceiling due to pooled water. – Dripping water during rainstorms.

Water leaks not only weaken structural components but can also lead to mold growth, posing health risks for occupants.

Granule Loss in Gutters: Common Signs You Need Roofing Repair Saint Michael Minnesota

If you find excessive granules in gutters after heavy rain, it’s an indication that shingles are deteriorating. Loss of granules reduces UV protection and accelerates wear on shingles.

Signs of Sagging Roofing in Saint Michael Minnesota

A drooping roof is a severe issue that often points to structural problems such as compromised decking or framing caused by moisture buildup over time. This situation requires immediate professional attention.

How Roof Installation Saint Michael Minnesota Can Help Lower Increasing Energy Bills

A poorly insulated roof with damaged materials can affect temperature regulation inside your home, causing heating and cooling systems to work harder than usual — reflected in higher energy bills.

When Should You Call Roofers Saint Michael Minnesota?

If you notice several signs listed above, consult with a professional roofing contractor promptly for an inspection. Delaying action could result in further damage to other parts of your home and increased repair costs down the road.

By proactively identifying these key signs, you can prioritize safety while ensuring the longevity and efficiency of your property’s roofing system.

Understanding Roof Replacement Costs and Budgeting Tips

When planning for a roof replacement, understanding the associated costs and how to budget effectively is essential. Roof replacement is a significant investment, and being informed can help you make the best decisions for your home or building. Below, we’ll break down key cost factors, budgeting tips, and strategies to ensure you’re financially prepared.

Key Factors Influencing Roof Replacement Costs

  1. The larger the roof, the more materials and labor will be required.
  2. Costs are typically calculated per square foot or roofing square (100 square feet).
  3. Different materials come with varying price points. For example: | Roofing Material | Average Cost per Square Foot | |————————–|——————————-| | Asphalt Shingles | $3–$5 | | Metal Roofing | $6–$12 | | Clay Tiles | $8–$15 | | Slate | $10–$20 |
  4. A simple roof with fewer angles or features will cost less to replace compared to intricate designs with dormers, chimneys, or skylights.
  5. Labor charges vary depending on location, contractor availability, and expertise.
  6. Local regulations may require permits for roofing projects.
  7. Fees for disposing of old materials are often factored into overall costs.

Tips for Creating an Accurate Budget

  1. Get Multiple Quotes
    Always obtain at least three estimates from licensed roofing contractors to compare costs accurately.
  2. Factor in Unexpected Expenses
    Set aside 10-15% of your budget for unforeseen issues like structural repairs or water damage discovered during the process.
  3. Choose Materials Based on Longevity vs Cost
    While premium materials like slate may seem expensive upfront, their durability can save money over time by reducing future maintenance or replacement needs.
  4. Consider Financing Options
    If replacing a roof requires upfront capital you don’t have readily available:

    • Look into low-interest home improvement loans.
    • Explore contractor financing programs if offered.
  5. Schedule Routine Maintenance After Replacement
    Regular inspections extend your new roof’s lifespan and help avoid costly repairs down the road.

Cost-Saving Strategies Without Compromising Quality

  • Opt for mid-range materials that balance affordability with durability.
  • Replace your roof during off-season months when demand is lower (commonly late winter).
  • Research contractor reviews thoroughly; a lower quote isn’t always worth sacrificing expertise.
  • Ask about warranty options that can further protect your investment over time.

Understanding these factors will help ensure you’re financially prepared when replacing your roof while maintaining control over costs without compromising quality.

Finding the Best Roofing Repair Contractors Saint Michael Minnesota for Your Home

When planning for a roof replacement, understanding the costs associated with different roofing materials is essential. Each material comes with unique price points, durability levels, and maintenance demands. Below is a detailed guide outlining the costs by material type and the factors that influence these prices.

Roofer Construction Worker Ensuring Roof Maintenance with Security Rope professional repair construction worker man roofer working on roof maintenance safety with secure rope roofing contractors stock pictures, royalty-free photos & images

Factors Influencing Roofing Costs

  • Size of the Roof: Larger roofs require more materials and labor.
  • Roof Complexity: Features such as valleys, skylights, or steep slopes can increase labor costs.
  • Local Labor Rates: Roofing costs vary depending on regional labor charges.
  • Material Quality: High-quality materials are more expensive but often last longer.
  • Removal of Old Roof: Additional expenses may arise if the old roof needs to be torn off and disposed of.

Cost Breakdown by Roofing Material

Roofing Material Average Cost (Per Sq. Ft.) Lifespan Maintenance Requirement
Asphalt Shingles $3 – $6 20-30 years Low
Metal Roofing $5 – $14 40-70 years Low to Moderate
Wood Shingles/Shakes $6 – $12 25-35 years Moderate
Clay Tiles $10 – $18 50+ years Low
Concrete Tiles $9 – $12 50+ years Low
Slate $15 – $30 75+ years Very Low

Asphalt Shingles

Asphalt shingles are among the most commonly used roofing materials due to their affordability and ease of installation. While they provide reliable weather resistance, they may need replacement sooner compared to premium options like slate or metal.

Metal Roofing

Metal roofs offer modern aesthetics combined with exceptional durability. They can withstand harsh weather conditions but may have higher upfront costs. However, their longevity often offsets this expense over time.

Wood Shingles/Shakes

For homeowners seeking a natural look, wood shingles or shakes can be an attractive choice. These roofs require regular maintenance, such as treating for moisture or insect damage, which adds to their lifetime cost.

Clay and Concrete Tiles

Clay and concrete tiles are popular in hotter climates thanks to their ability to reflect heat. While both options are heavy (requiring a strong roof structure), they add significant curb appeal and last decades with minimal upkeep.

Slate

Slate is one of the most durable roofing materials available but comes at a premium price point. Its natural stone appearance adds elegance to any home while providing unparalleled longevity.

Tips for Choosing the Right Material for Your Budget

  1. Assess Long-Term Value: While some materials have higher upfront costs, their extended lifespan may save you money in the long run.
  2. Consider Energy Efficiency: Materials like metal or clay tiles can improve insulation and reduce energy bills.
  3. Evaluate Maintenance Costs: Some options may require continuous upkeep—factor these expenses into your decision-making process.
  4. Understand Local Climate Needs: Choose a material that can handle your region’s weather patterns effectively.

By carefully considering these factors alongside your budgetary constraints, you can select the roofing material that best suits your needs while ensuring maximum value for your investment.

Step-by-Step Process of How a Roof Is Replaced Professionally

Roof replacement is a significant investment, and understanding the process can help homeowners feel more confident and prepared. Below is a detailed step-by-step guide to how professional roofers replace a roof efficiently and effectively.

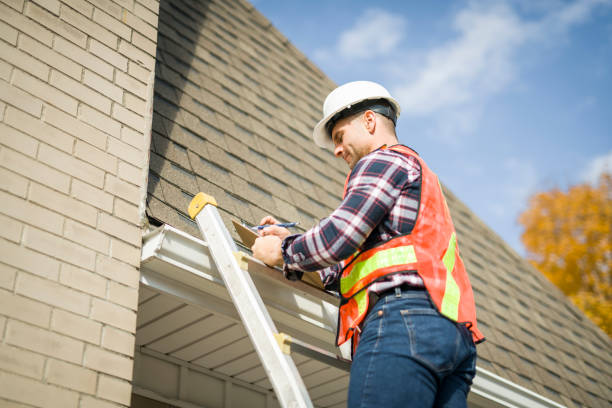
1. Initial Inspection and Assessment

  • Comprehensive Inspection: Professional roofers begin by examining the current condition of your roof. This includes identifying damage like leaks, missing shingles, or structural issues.
  • Detailed Estimate: After the inspection, you’ll receive a detailed estimate outlining labor costs, materials needed, and any additional repairs.

2. Preparing the Worksite

  • Protecting Your Property: To ensure minimal disruption and damage to your property, contractors cover landscaping, windows, and HVAC units with protective tarps or plywood.
  • Safety Measures: Roofing teams adhere to safety standards by setting up ladders securely and ensuring all workers use proper harnesses.

3. Removal of the Old Roof

This step involves stripping away the existing roofing materials: – Tearing Off Old Shingles or Materials: The old shingles or other roofing materials are carefully removed down to the decking. – Inspecting Decking: The bare decking is inspected for rot or weak spots that need repair before new materials are installed.

4. Repairs to Roof Decking (If Necessary)

Should any issues be identified during inspection: – Contractors replace damaged wood or other structural components to ensure a strong foundation for your new roof.

Issue Found Typical Solution Estimated Cost*
Rotting Wood Replace plywood sheets $40–$70 per sheet
Weak Spots Reinforce with structural fixes Varies by extent

(*Actual costs may vary depending on location.)

5. Installation of Underlayment

The underlayment is a vital barrier that protects against moisture penetration: – Waterproof Layer: A synthetic or felt underlayment is laid over the decking. – Attention to Detail: Professionals ensure there are no gaps or wrinkles in this layer.

6. Flashing Installation

Flashing protects vulnerable areas like chimneys, skylights, and valleys: – Flashing prevents water from seeping into joints and corners.

Properly installed flashing is crucial for long-term waterproofing.

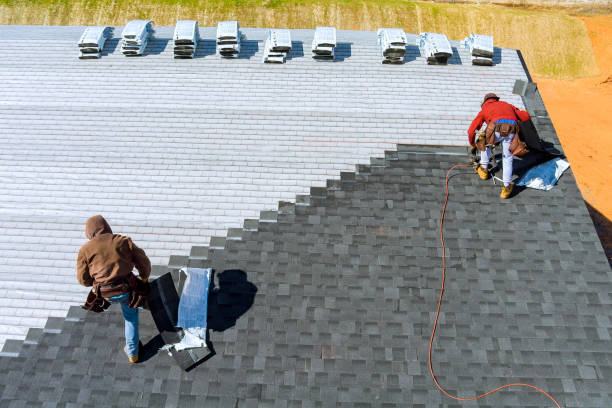
7. Installing New Roofing Material

Whether you’ve chosen asphalt shingles, metal panels, clay tiles, or another material type: – Professionals begin at the bottom edge of the roof and work upward in overlapping layers.

Material Type Typical Installation Method Lifespan
Asphalt Shingles Nailed in overlapping rows 20–30 years
Metal Panels Screwed down with fasteners 40–70 years
Clay/Concrete Tiles Individually placed over underlayment 50+ years

8. Cleanup Process

Once installation is complete: – Contractors remove debris from your yard. – Magnetic tools are often used to collect stray nails left behind during construction.

A final walkthrough ensures everything meets quality standards before concluding work on-site.

Professional roof replacement follows these steps meticulously to ensure durability and performance over decades. Working with experienced roofers ensures that every detail – from preparation to cleanup – is managed efficiently while maintaining high-quality results.

Roof shingle replacement Roofers replacing old roof shingles with New shingles on residential home using a nail gun. roofing contractors stock pictures, royalty-free photos & images

Step-by-Step Process of How a Roof Is Replaced Professionally

Replacing a roof is a complex process that requires careful planning, expertise, and precision. Hiring professional roofers ensures the job is completed efficiently and safely. Below is a detailed step-by-step breakdown of how a roof replacement is conducted by experts.

Initial Assessment and Inspection

  1. Roofers perform a detailed inspection to assess the condition of the existing roof.
  2. They identify issues like leaks, damaged shingles, rotting wood, or inadequate ventilation.
  3. Based on the inspection, professionals provide an estimate that includes labor costs, materials, timeline, and any additional repairs required.

Preparation for Roof Replacement

  1. Before starting work, contractors secure any permits required by local authorities to ensure compliance with building codes.
  2. Professional roofers cover landscaping with tarps or plywood to protect it from falling debris during the replacement process.
  3. Gutters are safeguarded to avoid accidental damage during installation.
  4. The roofing materials (e.g., shingles, flashing) are delivered on-site before work begins to ensure no delays occur.

Removal of the Old Roof

  1. The old roofing material is carefully removed down to the decking layer beneath.
  2. All nails and fasteners are extracted to create a clean surface for installation.
  3. Professionals check for rot or structural issues in the decking once the old roof has been stripped.
  4. Damaged sections are replaced to ensure proper support for the new roof.

Installation of New Roofing System

  1. A waterproof underlayment or felt paper is applied to provide an extra layer of protection against water infiltration.
  2. Flashing around chimneys, valleys, vents, and skylights is installed or replaced as needed to prevent leaks in vulnerable areas.
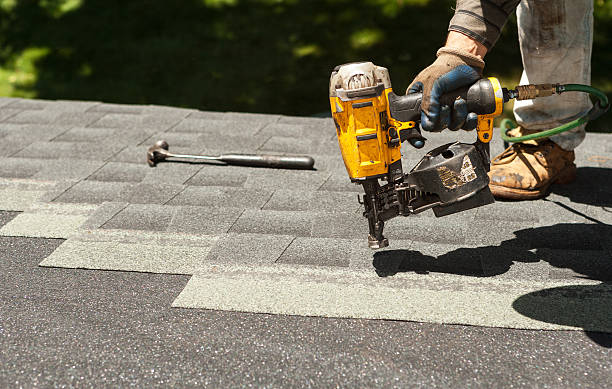
    • Shingles or other chosen materials are installed using precise alignment techniques.
    • Contractors follow manufacturer guidelines for securing each layer properly.
    • Proper attic ventilation systems (such as ridge vents) may be installed or updated if necessary for airflow efficiency and longevity of roofing materials.

Final Inspections and Cleanup

  • A thorough inspection ensures that all work meets industry standards and there are no imperfections in installation.
  • Professionals confirm that all flashing has been sealed properly and there are no gaps or loose materials.
  • Debris generated from tearing off old roofing material is removed from the property.
  • Nails are collected using magnets to ensure safety in surrounding areas.
  • Homeowners receive documentation covering warranties for both materials used and labor provided by the contractor.

Benefits of Professional Roof Replacement

  • Safety: Expert teams use proper tools and techniques to minimize risks associated with working at heights.
  • Efficiency: Professionals complete projects faster due to experience and access to specialized equipment.
  • Warranty Coverage: Most professional services offer warranties for their workmanship alongside manufacturer warranties on materials.
  • Compliance with Codes: Contractors ensure all work aligns with building regulations in your area.

By understanding each step involved in professional roof replacement, homeowners can better appreciate both its complexity and importance in maintaining their property’s structural integrity over time.

Different Types of Roofing Materials and Their Benefits

When considering a roof replacement or installation, selecting the right roofing material is one of the most critical decisions. Each type of roofing material offers unique benefits in terms of durability, aesthetic appeal, cost, and energy efficiency. Below is a detailed overview of popular roofing materials and their advantages to help you make an informed decision.

Asphalt Shingles

Asphalt shingles are the most commonly used roofing material in residential projects. They are affordable, easy to install, and available in various colors and styles. – Benefits: – Cost-effective option compared to other materials. – Low maintenance requirements. – Come in a wide range of colors and textures. – Lifespan: Typically lasts 15-30 years depending on quality.

Metal Roofing

Metal roofs are gaining popularity due to their durability and modern aesthetic. They are available in materials like aluminum, steel, copper, or zinc. – Benefits: – Highly durable with a lifespan of 40-70 years. – Resistant to extreme weather conditions such as heavy rain or snow. – Reflects heat, improving energy efficiency. – Lightweight yet strong.

Clay Tiles

Clay tiles bring a timeless appearance often associated with Mediterranean-style homes. These tiles offer exceptional longevity but can be on the pricier side. – Benefits: – Extremely durable with a lifespan exceeding 50 years if properly maintained. – Resistant to fire and rot. – Outstanding insulation properties for warmer climates.

Feature Clay Tiles
Lifespan Over 50 years
Climate Suitability Warm climates
Cost Higher upfront cost

Slate Roofing

Slate is one of the most premium options for roofing materials. It is known for its natural beauty and incredible durability. – Benefits: – Exceptional longevity; can last over a century with proper care. – Highly resistant to damage from fire or moisture infiltration. – Eco-friendly as it’s made from natural stone.

Wood Shakes or Shingles

Wood shingles offer an organic aesthetic that blends well with natural surroundings. Commonly made from cedar, these roofs add charm but require regular maintenance.

  • Provides excellent insulation properties.
  • Sustainable options available! -Brief comparative conclusion

Different Types of Roofing Materials and Their Benefits

Choosing the right roofing material for your home or building is a critical decision that impacts both the functionality and aesthetics of your property. Each material comes with its own set of advantages, making it crucial to assess your specific needs, budget, and the local climate before making a choice. Below is an overview of some popular types of roofing materials and their benefits.

Asphalt Shingles

Asphalt shingles are one of the most widely used roofing materials in residential construction. They are favored for their affordability and ease of installation.

Benefits:Cost-effective: Asphalt shingles are budget-friendly compared to other materials. – Variety: Available in numerous colors, styles, and textures to match architectural preferences. – Durability: Can last 20–30 years with proper maintenance. – Ease of Repair: Individual shingles can be replaced without major disruption.

Feature Asphalt Shingles
Lifespan 20–30 years
Cost Low
Installation Effort Easy

Metal Roofing

Metal roofs have been gaining popularity due to their longevity, sleek appearance, and energy efficiency.

Benefits:Durability: Can last 40–70 years or more with minimal maintenance. – Energy Efficiency: Reflects sunlight, reducing cooling costs during warm months. – Lightweight: Puts less stress on the structure compared to heavier materials like tile or slate. – Recyclable: Often made from recycled content and can be recycled at the end of its life cycle.

Common Types of Metal Roofing: – Aluminum – Steel – Copper – Zinc

Clay and Concrete Tiles

Clay and concrete tiles are known for their durability and distinctive Mediterranean aesthetic.

Benefits:Longevity: Can last over 50 years under proper conditions. – Fire Resistance: Non-combustible material ensures better protection against fire hazards. – Aesthetic Appeal: Adds an elegant look that complements various architectural styles.

However, they are much heavier than other options, so structural reinforcement might be necessary.

Slate Tiles

Slate offers unparalleled elegance combined with incredible durability. It’s often regarded as a premium roofing material.

Benefits:Exceptional Longevity: Lasts over 75 years; some installations exceed 100 years. – Natural Beauty: Available in natural shades like gray, green, purple, and black that enhance curb appeal. – Eco-Friendly: A natural material that requires minimal processing.

Keep in mind that slate is among the most expensive choices available on the market due to its high quality.

Wood Shingles/Shakes

Wooden roofing provides a rustic charm that’s particularly suitable for cottages or historic homes.

Benefits:Aesthetic Appeal: Offers a warm, natural look unmatched by synthetic alternatives. – Insulation Properties: Provides better insulation compared to some other materials.

While visually appealing, wood requires consistent maintenance to prevent mold or rot caused by moisture exposure.

Synthetic Roofing Materials

Synthetic options such as rubber or polymer-based composite shingles mimic higher-end materials like slate or wood but at a fraction of the cost.

Benefits:Affordability: Provides the look of expensive materials without breaking your budget. – Lightweight & Easy Installation: Reduces labor costs and installation timeframes.

Material Type Longevity Key Benefit
Asphalt Shingles 20–30 years Affordable & versatile
Metal Roofing 40–70+ years Durable & energy efficient
Clay/Concrete Tiles 50+ years Fire-resistant & stylish
Slate 75–100+ years Long-lasting & luxurious
Wood Shingles/Shakes ~30 years Natural rustic charm
Synthetic Materials ~50+ years Cost-effective durability

Factors to Consider When Choosing Roofing Materials

  1. Assess your budget while keeping long-term costs in mind (e.g., maintenance).
  2. Understand your local climate conditions—some materials perform better in cold climates while others excel in heat resistance.
  3. Consider aesthetic preferences based on what complements your property’s exterior design style.
  4. Evaluate environmental impact if sustainability matters to you (e.g., metal roofs being recyclable).

By understanding these factors alongside the advantages offered by each type of roofing material, homeowners can make informed decisions tailored to their unique needs.


Continue ReadingUnderstanding Roofing Repair Service Saint Michael Minnesota: Everything You Need to Know

Assessing the Condition of Your Current Roof

man with hard hat standing on steps inspecting house roof A man with hard hat standing on steps inspecting house roof roofing contractors stock pictures, royalty-free photos & images

Your roof is one of the most critical components of your home, protecting it from weather elements and contributing to overall structural integrity. Over time, roofs experience wear and tear that may require minor repairs or, in some cases, a full replacement. But how do you know when it’s time for a roof replacement? Understanding key factors can help you make an informed decision.

  • Age of the RoofIf your roof is nearing or exceeding this range, it might be time to consider replacement.
  • Shingle DamageDamaged shingles leave your roof vulnerable to leaks and further deterioration.
  • Granule Loss: Asphalt shingles lose granules over time, which can often be seen collecting in gutters. Excessive granule loss reduces the effectiveness of your roof’s protective barrier.
  • Sagging Areas: A sagging roofline could indicate structural damage or water accumulation in certain areas.
  • Moss and Algae Growth: While moss and algae growth may not always demand immediate replacement, they can cause long-term damage if left untreated.

Homeowners are encouraged to perform regular visual inspections throughout the year.

  1. Inspect flashing around chimneys, vents, and skylights for signs of cracks or gaps.
  2. Look at the edges of the roof where gutters connect for signs of rot or water damage.
  3. Review attic spaces for light penetration through the ceiling boards.
  4. Check insulation for moisture build-up caused by leaks.
  5. After storms with heavy winds or hail, inspect for visible damage like dented metal parts (e. g. , flashing) or loose shingles.

If you’re unsure about what you’re seeing during these inspections—or if accessing the roof feels unsafe—it’s best to consult a professional roofer.

Professional Roof Assessment vs DIY Inspection

While DIY inspections are helpful as an initial step, hiring a professional ensures any underlying issues are identified early. Professional roofing contractors utilize specialized tools and expertise to provide accurate recommendations regarding whether repair or replacement is necessary.

Item DIY Inspection Professional Assessment
Tools Required Ladder, flashlight Infrared scanners, moisture readers
Time Investment 1–2 hours Varies based on inspection depth
Accuracy Moderate High

Costs Involved in Delaying Replacement

  • Increased utility bills due to poor insulation
  • Damage spreading beyond roofing material (e. g.
  • Potential mold growth from prolonged water intrusion

By understanding these warning signs and regularly assessing your roof’s condition through professional evaluations when needed, you ensure not only safety but also protection against unexpected expenses down the road. Timely action preserves both functionality and value within your property portfolio while maintaining peace of mind as a homeowner.

Timely Tips from Roofing Contractors Saint Michael Minnesota on Avoiding Roof Replacement Delays

Delaying a roof replacement can lead to significant problems for your home, impacting everything from structural integrity to your long-term financial health. Understanding the consequences of postponing this critical task can help homeowners make informed decisions.

Expert Roofing Repair Service Saint Michael Minnesota for Structural Damage

When a roof reaches the end of its lifespan or suffers damage, it becomes less effective at protecting your home.

  • Water Leaks: Cracked shingles or weakened flashing allow water to seep in, resulting in mold, mildew, and rot.
  • Compromised Insulation: Water infiltration affects insulation materials, reducing energy efficiency and increasing utility bills.
  • Roof Collapse: A severely damaged roof left untreated could weaken over time and pose safety risks.

Understanding Costs with a Roofing Repair Company Saint Michael Minnesota

While avoiding roof replacement might seem cost-effective in the short term, it often leads to more expensive repairs later.

Problem Cost Implications How It Builds Up
Small leaks Minimal at first Escalates into widespread damage
Damaged decking Moderate repair cost Could require full structural work
Compromised gutters/downspouts Repairs become frequent Adds up over time

Choosing timely replacement can save you from accumulating repair costs that may ultimately exceed the cost of a new roof.

How a Roofing Company Saint Michael Minnesota Can Prevent Decreased Property Value

  1. Curb Appeal: Missing shingles or visible wear and tear create an unkempt appearance.
  2. Home Inspection Issues: Potential buyers may demand price reductions due to significant roofing concerns.
  3. Appraisal Problems: A poor-quality roof may lower your home’s appraised value during refinancing.

Investing in a replacement ensures that your property retains its value and remains attractive on the market.

Protect Your Home with Roofing Service Saint Michael Minnesota to Prevent Mold and Mildew

  • Respiratory issues such as coughing or wheezing
  • Allergic reactions triggered by airborne spores
  • Increased risk for individuals with asthma or compromised immune systems

Maintaining a safe living environment relies heavily on having a secure and functional roof.

Prevent Energy Efficiency Loss with Expert Roofing Repair Saint Michael Minnesota

An old or damaged roof compromises insulation, making it harder for your HVAC system to maintain indoor temperatures.

  • Elevated heating and cooling costs.
  • Uneven room temperatures throughout the house.
  • Additional strain on HVAC systems, potentially shortening their lifespan.

Replacing an outdated roof with modern materials enhances energy efficiency while lowering monthly utility expenses.

By addressing roofing issues promptly through replacement when necessary, homeowners mitigate risks, preserve their investment, and create a safer living space for years to come.

Key Signs You Need a New Roof: Expert Tips on Roofing Saint Michael Minnesota

Recognizing the signs that your roof may need replacement is crucial to protecting your home, avoiding costly repairs, and maintaining its value. While some indicators are obvious, others require a closer inspection. Here are the key signs and indicators that it might be time to invest in a new roof.

Age of the Roof

One of the first factors to consider when evaluating whether you need a new roof is its age.
Asphalt shingles: 20–30 years
Metal roofs: 40–70 years
Clay tiles: Over 50 years with proper maintenance
Wood shingles/shakes: 20–25 years

If your roof has surpassed its expected lifespan or is nearing it, it’s worth considering a replacement even if there aren’t immediate visible problems.

Visible Damage or Deterioration

Inspecting your roof for damage can reveal whether a replacement is necessary.
Cracked, curled, or missing shingles: These compromise the overall structure and water resistance of the roof.
Granule loss: Shingles with significant granule loss appear bald and may leave granules in gutters or downspouts. This indicates aging materials.
Sagging rooflines: A sagging appearance could point to structural issues such as rotting supports or water damage.

It’s important not to ignore these signs as they can quickly worsen.

Leaks and Water Damage

Water stains on ceilings or walls inside your home may signal leaks caused by roofing issues. These could be due to damaged shingles, poor flashing, or underlayment failures.
– Dripping water from ceilings or attic spaces
– Dark streaks running down walls near windows or corners

Addressing leaks promptly can prevent mold growth and additional structural damage.

Energy Efficiency Problems

Older roofs often lack proper insulation or ventilation, which can lead to higher heating and cooling costs. If you’ve noticed consistent spikes in energy bills without any other explanation, an aging roof with insufficient insulation could be contributing to temperature fluctuations inside your home.

Moss, Algae, and Mold Growth

The presence of moss or algae on your roof doesn’t always mean you need an immediate replacement; however, it can signal trapped moisture that accelerates wear-and-tear over time. If left untreated, this issue could lead to rot or structural deterioration.

Issue Possible Causes Action Needed
Missing shingles High winds/storms Repair/replace shingles
Water stains indoors Roof leak Inspect leak source
Sagging areas Structural weakness Professional assessment

Professional Inspection

While many signs are visible from ground level or during basic inspections at home, hiring a professional roofer for an annual assessment ensures no underlying problems are missed. Professionals are equipped to inspect hard-to-reach areas like flashing around chimneys and valleys where leaks often develop.

Regular inspections allow homeowners to identify minor issues before they escalate into major ones requiring full roof replacement.

By staying vigilant about these key indicators—age-related wear-and-tear, physical damage, energy inefficiency—you can determine when it’s time for a new roof while avoiding unnecessary risks associated with delays.

Roofers installing new roof on house Roofers installing new roof on house roofing contractors stock pictures, royalty-free photos & images

Benefits of Roof Installation Saint Michael Minnesota for Durability and Increased Home Value

Investing in a roof replacement offers significant long-term benefits. A roof is one of the most critical components of your home, protecting it from the elements and contributing to its structural integrity and aesthetic appeal. Let’s explore how a new roof can enhance durability, improve energy efficiency, and boost home value.

Enhanced Durability and Weather Resistance

A new roof provides better protection against harsh weather conditions, such as heavy rain, snow, windstorms, or high temperatures. Over time, older roofs become susceptible to wear and tear, leading to potential damage that might compromise your home’s safety.

Key benefits include: – Use of modern materials with advanced durability. – Improved resistance to water leaks or mold growth. – Increased ability to withstand extreme weather conditions.

Installing high-quality roofing materials ensures you won’t have to worry about frequent maintenance or repairs caused by an aging structure.

Improved Energy Efficiency

Roofing technology has come a long way in recent years. Many modern roofing systems are designed with energy efficiency in mind. By replacing an old or inefficient roof, homeowners can benefit from lower energy bills and a more comfortable living environment.

Features that contribute to energy savings: – Reflective shingles: Reduce heat absorption during sunny days.Proper insulation: Helps regulate indoor temperature throughout the year.Ventilation upgrades: Improves airflow in the attic space.

These improvements not only reduce monthly utility costs but also make your home more environmentally friendly.

Boosted Curb Appeal and Home Value

A new roof significantly enhances the appearance of your property. Whether you’re planning to sell your home soon or simply want to maintain its value over time, updating the roof is an investment worth considering.

Ways a new roof adds value: 1.Improved aesthetics: Modern shingles come in various colors and styles that complement different architectural designs. 2.Higher resale value: According to industry studies, homeowners can recoup a significant portion of their roofing investment when selling their property. 3.Increased buyer interest: A well-maintained exterior signals reliability to potential buyers.

Benefit Impact on Home Value
Enhanced curb appeal Attracts more potential buyers
Energy-efficient design Adds marketability for eco-conscious buyers
Low-maintenance materials Reduces future ownership costs

Peace of Mind for Homeowners

Finally, performing a timely roof replacement eliminates ongoing worries about potential issues like leaks or structural instability. With warranties typically available on new roofs for up to 20-50 years (depending on material), you’re ensuring long-term peace of mind for yourself and future occupants of the home.

By investing in quality craftsmanship and durable materials during replacement, you’re not only safeguarding your property but also setting yourself up for reduced maintenance expenses down the road.

The Average Roof Lifespan and How Roofers Saint Michael Minnesota Can Help with Replacement

Understanding the average lifespan of a roof is crucial when determining whether it is time to repair or replace it. Several factors influence how long a roof will last, including the type of material, installation quality, climate conditions, and regular maintenance practices. Let’s delve deeper into these factors and explore how they can impact your decision-making process.

Typical Roof Lifespans Based on Material

Each roofing material has a different average lifespan.

Roofing Material Average Lifespan Maintenance Requirements
Asphalt Shingles 20-30 years Regular inspections; replace damaged shingles
Metal Roofing 40-70 years Minimal; occasional rust treatment
Wood Shingles/Shakes 25-40 years Frequent cleaning and sealing
Clay Tiles 50-100 years Periodic checks for cracks or wear
Slate Roofing 75-200 years Minimal; ensure proper support structure

It’s important to note that these numbers are averages, meaning individual roofs may last longer or shorter depending on external factors.

Factors That Influence Roof Longevity

  1. Harsh weather conditions like heavy snow, hailstorms, or strong winds can reduce your roof’s lifespan.
  2. Constant exposure to UV rays in sunny climates may deteriorate certain materials faster (e. g. , asphalt shingles).
  3. Poor installation can significantly decrease the longevity of any roofing system. Ensuring professional installation is key to maximizing durability.
  4. Improper ventilation in your attic can trap heat and moisture, leading to premature wear on your roofing materials. Adequate insulation also helps maintain temperature balance.
  5. Performing routine inspections (twice annually) allows you to identify issues such as leaks, missing shingles, or damaged flashing before they worsen.
  6. High-quality materials typically come with a higher upfront cost but offer greater durability over time, saving money in the long run.

When Should You Consider Replacement Over Repairs?

While some minor issues can be addressed with repairs, there comes a point when replacement is more cost-effective and beneficial in the long term.

  • The roof’s age exceeds its expected lifespan based on its material type.
  • Frequent need for repairs indicates structural weaknesses.
  • Significant water damage or recurring leaks are present.
  • Mold growth or sagging areas indicate deeper issues with the underlying structure.
  • Energy bills are increasing due to poor roof insulation or ventilation performance.

Making an Informed Decision

Understanding how long roofs typically last depending on materials—and the factors influencing their condition—can help you make an informed decision about whether replacement is necessary. Investing in high-quality materials during replacement ensures better longevity while enhancing energy efficiency and home value over time.

Regular maintenance remains essential regardless of whether you’re prolonging an existing roof’s life or ensuring a newly installed one achieves its maximum potential lifespan.


Continue ReadingAssessing the Condition of Your Current Roof

Expert Tips from a Roofing Repair Company Saint Michael Minnesota on Drip Edge Installation

Roof repair, worker with white gloves replacing gray tiles or shingles on house with blue sky as background and copy space, Roofing - construction worker standing on a roof covering it with tiles. Roof repair, worker with white gloves replacing gray tiles or shingles on house with blue sky as background and copy space, Roofing - construction worker standing on a roof covering it with tiles. roofing contractors stock pictures, royalty-free photos & images

Proper drip edge installation is a critical aspect of maintaining the longevity and effectiveness of a roofing system. While it may seem like a small detail, the drip edge plays an essential role in directing water away from the fascia and into the gutter system, preventing costly damage to the roof deck, soffit, and foundation. For roofers, understanding how to install or retrofit a drip edge on an existing roof is vital for ensuring customer satisfaction and building long-lasting roofs.

What Is a Drip Edge?

  • Preventing Water Damage: Keeps water from seeping under shingles or into wooden structures.
  • Enhancing Aesthetic Appeal: Creates clean lines along the edges of the roof.
  • Protecting Fascia Boards: Shields them from rot caused by prolonged water exposure.
  • Supporting Shingle Integrity: Reduces uplift caused by strong winds.

Why Retrofitting Drip Edge Is Important

  1. Prevents Costly Repairs
    Without a properly installed drip edge, rainwater can infiltrate fascia boards or leak into underlying structures, leading to rotting wood, mold growth, or foundation issues.
  2. Improves Gutter Efficiency
    A correctly installed drip edge ensures that rainwater flows seamlessly off the roof into gutters instead of pooling in unwanted areas.
  3. Complies with Modern Building Codes
    Many local building codes now require drip edges as part of new roofing installations due to their proven benefits in protecting structural integrity.
  4. Boosts Longevity of Roofing Materials
    By keeping moisture at bay, retrofitted drip edges help extend the lifespan of shingles and other roofing materials.

Key Considerations Before Installation

  • Roof Condition: Inspect shingles for damage or curling before proceeding with installation.
  • Drip Edge Material: Choose appropriate materials like aluminum (lightweight and corrosion-resistant) or galvanized steel (durable but heavier).
  • Weather Conditions: Avoid installing during wet weather where adhesive strength may be compromised.
  • Building Code Requirements: Check local regulations regarding material specifications and installation methods.

Advantages of Professional Drip Edge Retrofit

Benefit Description
Expertise Professionals are familiar with complex retrofits.
Proper Tools Access to specialized tools ensures accuracy.
Long-Term Performance Ensures that modifications last for decades ahead.

Roofers who prioritize proper implementation demonstrate their commitment to quality work while also reducing potential callbacks for repairs related to water intrusion issues—a win-win scenario for both contractors and homeowners.

By understanding why installing or retrofitting a drip edge matters, roofers can elevate their craftsmanship while providing homeowners with peace of mind that their roofs are well-protected against weather-driven wear and tear over time.

Essential Tools for Drip Edge Retrofit Projects by a Roofing Company Saint Michael Minnesota

When undertaking a drip edge retrofit project, having the right tools ensures efficiency, precision, and longevity of the installation. Professional roofers rely on a combination of manual and power tools tailored for specific tasks in drip edge installation. Below is a comprehensive guide to the essential tools required for this type of project.

Hand Tools Every Roofer Should Have

  • Tape Measure: Accurate measurements are crucial when cutting and fitting drip edges. A high-quality tape measure ensures precise alignment along the roofline.
  • Utility Knife: Used for trimming roofing materials like shingles or underlayment to ensure proper placement of the drip edge.
  • Snips (Tin or Aviation Snips): These are essential for cutting aluminum or steel drip edges cleanly. They allow for intricate cuts needed around corners or irregular shapes.
  • Hammer: While nail guns are often used today, roofers still need a hammer on hand for situations requiring manual nailing.
  • Pry Bar: This tool is helpful when lifting existing shingles slightly to install a new drip edge without causing damage.

Power Tools That Enhance Efficiency

  • Circular Saw with Metal-Cutting Blade: For larger projects requiring multiple pieces of custom-sized drip edges, this tool speeds up the cutting process while maintaining precision.
  • Cordless Drill: Essential for securing screws into harder surfaces or areas where nails aren’t appropriate.
  • Nail Gun (Roofing Nail Gun): Saves time when attaching the drip edge securely to the fascia board or roof deck.

Supporting Materials and Supplies

Material/Supply Purpose
Roofing Nails Used to secure drip edges firmly into place.
Galvanized Screws Alternative fastening option in certain conditions.
Adhesive Sealant Provides additional protection against water infiltration.
Chalk Line Ensures straight lines when marking placement points.
Protective Gear Gloves, safety glasses, and non-slip boots ensure roofer safety.

Tips for Tool Selection

  1. Invest in high-quality tools that can withstand frequent use and harsh outdoor conditions.
  2. Opt for rust-resistant options (e.g., galvanized snips) when working with metal components like aluminum drip edges.
  3. Use ergonomic tools whenever possible to reduce strain during extended projects.

Maintenance of Tools

  • Wipe down metal-cutting blades after use to prevent dullness or rust.
  • Sharpen snips regularly to maintain clean cuts on metal trim.
  • Inspect hammers and utility knives frequently, replacing worn-out parts as needed.

Having access to these essential tools—and knowing how to use them effectively—will streamline any drip edge retrofit project while ensuring professional-grade results that stand up against weather elements over time.

Step-by-Step Guide to Roofing Service Saint Michael Minnesota: Cutting Two Types of Drip Edge for Success

When installing or retrofitting a drip edge, one of the most important steps is cutting it properly to ensure it fits seamlessly with the roof structure. A well-executed cut not only enhances the aesthetics but also ensures that the drip edge functions effectively by directing water away from the fascia and underlying roof components. Here, we provide a detailed guide on cutting two common types of drip edge: “L-style” and “T-style.”

Tools You’ll Need

Before beginning, gather the necessary tools to make precise cuts. The right tools will save time and improve accuracy.

  • Measuring tape: Essential for exact measurements.
  • Tin snips: Ideal for making clean cuts in metal drip edges.
  • Marker or pencil: Useful for marking areas to cut.
  • Straightedge or square: Helps achieve straight lines.
  • Work gloves: Protect your hands from sharp metal edges.
  • Metal file (optional): Smooths rough edges after cutting.

Cutting an L-Style Drip Edge

The L-style drip edge is commonly used due to its simple design and functionality. It features a flat vertical section that runs along the fascia and a horizontal flange that extends under shingles.

  1. Measure and Mark: Use measuring tape to determine the required length. Mark your cutting points on both sides using a pencil or marker.
  2. Position Your Straightedge: Align a straightedge along your markings for guidance during cutting.
  3. Cut with Tin Snips: Hold the tin snips at a slight angle to prevent bending the metal while you cut along your line. Complete one side of the L first, then move to the other for precision.
  4. Check Fit: Test-fit your cut piece against the roof edge before installation. If any adjustments are needed, trim small sections gradually rather than rushing additional cuts.

Pro Tip: When working around corners, make angled cuts (typically 45 degrees) at adjoining ends to avoid overlaps or gaps.

Cutting a T-Style Drip Edge

The T-style drip edge features an additional flange section that provides extra stability and water redirection capability.

  1. Measure Twice: With T-style edging, accurate measurements are crucial due to its more complex profile.
  2. Mark Key Points: Mark not only where you’ll cut but also where any bends need adjustment (for corners or valleys).
  3. Start Your Cut: Use tin snips specifically designed for heavier gauge metals if applicable. Begin cutting at one end of the “T” section while keeping pressure consistent across the blade.
  4. Trim Flange as Needed: In cases where shingles overlap significantly, you may need to trim excess material from the horizontal flange without compromising strength.

Note: Always wear protective gloves when working with T-style edges as their sharp profiles can cause injuries during handling or cutting.

Additional Tips for Both Styles

To ensure success when working with either L-style or T-style drip edges: – Double-check all measurements before making cuts—small errors can lead to improper fits that compromise water management. – Always make gradual adjustments rather than large modifications; metal cannot be “un-cut.” – File down sharp edges after each cut to prevent potential damage during installation.

Type Advantages Key Considerations
L-Style Simpler design; easy installation Works best on straight edges
T-Style Enhanced stability; superior water control Requires precise cornering

By following these steps, professional roofers can achieve clean, efficient cuts that result in effective roofing installations with long-term benefits for clients’ homes or buildings.

Expert Roofing Contractors Saint Michael Minnesota: Installing Drip Edge Under Existing Roof Shingles

Proper installation of a drip edge under existing roof shingles is a vital step to enhance the longevity and structural integrity of a roofing system. A drip edge is more than just an aesthetic addition—it provides critical protection from water damage by directing rainwater away from the fascia, underlying structures, and foundation. Below, we’ll explore the importance of this process, steps for implementation, and tips for achieving better outcomes.

Expert Tips for Roofing Repair Saint Michael Minnesota: Drip Edge Installation Explained

  • Protects Against Water Damage: Prevents water from seeping into the roof deck or fascia boards.
  • Reduces Ice Dams: Helps in channeling melting snow off the roof properly.
  • Improves Aesthetics: Provides a polished look that enhances curb appeal.
  • Extends Roof Lifespan: Shields vulnerable areas like edges and corners from weather elements.

Without proper installation, roofs can suffer from premature wear, leaks, or rot—leading to costly repairs over time.

Tools and Materials Needed for Roofing Saint Michael Minnesota

Tool / Material Purpose
Hammer/roofing nails Secures the drip edge in place
Pry bar Lifts existing shingles without causing damage
Tin snips Cuts drip edge material to size
Measuring tape Ensures precise alignment along the roofline
Roofing adhesive (optional) Adds additional sealing strength

Professional Construction Worker Assembling Roof Wooden Elements Professional Caucasian Construction Worker Wearing Hard Hat Assembling Roof Wooden Elements roofing contractors stock pictures, royalty-free photos & images

Steps for Roof Installation Saint Michael Minnesota: Installing Drip Edge Under Existing Shingles

  1. Start by inspecting the eaves and edges of the roof to determine where water seepage might occur. Ensure there’s no prior damage that needs addressing before proceeding.
  2. Use a small pry bar or flat tool to gently lift the first row of shingles along the eaves without cracking or tearing them.
  3. Measure and cut sections of drip edge material with tin snips to fit precisely along each section of your roofline.
  4. Slide each piece of drip edge underneath lifted shingles while ensuring it covers gaps between fascia boards and decking.
  5. Nail down each section using roofing nails spaced approximately 12 inches apart.
  6. Once all sections are secured, gently press down lifted shingles back into place. Use roofing adhesive if needed to reseal any disturbed areas for added protection.

Top Tips From Roofers Saint Michael Minnesota For Professional Results

  • Always overlap sections of the drip edge by at least 2 inches at joints to prevent gaps.
  • Check local building codes regarding specific requirements for materials or techniques.
  • Use corrosion-resistant nails or fasteners designed specifically for roofing applications.
  • Avoid rushing; take time to align each piece properly before securing it.

Benefits Of Professional Installation Techniques

  1. Eliminating potential leaks caused by improper alignment.
  2. Enhancing resistance against wind-driven rain.
  3. Providing durability even during heavy storms or seasonal changes.

By following these steps with precision, contractors can help protect homes effectively while maintaining high standards of craftsmanship in their work.

Expert Tips from Roofing Repair Contractors Saint Michael Minnesota on Drip Edge Installation Techniques

Proper installation of a drip edge is a critical component in ensuring the longevity and functionality of any roofing system. The drip edge, a thin metal flashing installed along the edges of a roof, acts as an important barrier to direct water safely away from the fascia and underlying roofing components. Here’s why it matters and how roofers can approach this task with precision.

The Role of Drip Edge in Roof Performance

  • Prevents Water Damage: By channeling rainwater away from roof edges, fascia boards, and soffits, drip edges reduce the risk of rotting wood or damage caused by water seepage.
  • Enhances Roof Longevity: Improper water flow can lead to premature wear on shingles or underlayment. A well-installed drip edge minimizes these risks.
  • Protects Against Wind-Driven Rain: Without a drip edge, wind-driven rain can push moisture under shingles or into vulnerable areas, compromising the roof’s integrity over time.
  • Supports Ice Dam Prevention: In colder climates, drip edges help prevent ice dams by ensuring proper water runoff during freeze-thaw cycles.

Neglecting to install or improperly installing a drip edge exposes roofs to significant structural vulnerabilities.

Key Techniques for Installing Drip Edges Correctly

  1. Commonly used materials include aluminum (lightweight and rust-resistant), galvanized steel (durable but prone to rust if not coated), and copper (highly durable but expensive).
  2. Choose materials that suit the local climate conditions and match client preferences.
  3. Always install the drip edge underneath the first layer of roofing material on new roofs.
  4. For retrofits, ensure it slides underneath existing shingles without disrupting their placement or damaging them.
  5. Use corrosion-resistant nails spaced approximately 12 inches apart along the length of the flashing.
  6. Avoid overdriving nails into the material as this may compromise its structural integrity.
  7. Ensure each section of flashing overlaps by at least two inches to prevent gaps where water could penetrate.
  8. Pay close attention to corners where improper alignment could create weaknesses.
  9. Adjust cutting angles based on roof pitch for seamless alignment with eaves and rakes.

Common Mistakes to Avoid During Installation

Mistake Risks
Failure to overlap sections Water infiltration at seams
Using non-corrosion-resistant nails Premature rusting leading to instability
Improper placement above shingles Poor water drainage and potential leaks
Ignoring local building codes Risk of fines or having to redo installations

Why Precision Matters

Precise installation doesn’t just protect homes—it reflects professionalism and builds trust with clients. Homeowners rely on skilled roofers not only for expertise but also for solutions that will last decades without frequent repairs. By adhering strictly to best practices in installing drip edges, professionals demonstrate their commitment to delivering high-quality results.

Proper attention during this small yet significant step ensures that every roofing project stands up against environmental challenges while maintaining aesthetic appeal—key factors in client satisfaction and long-term success as a roofer.

Expert Roofing Repair Service Saint Michael Minnesota: Precision and Care in Every Job

Professional roofers understand that retrofitting an existing roof requires a meticulous approach to ensure durability, efficiency, and aesthetic appeal. Whether adding drip edges or reinforcing existing structures, experienced contractors follow a series of well-considered steps to deliver successful outcomes. Below is an exploration of essential methods and considerations that professional roofers employ when approaching retrofits.

Detailed Assessment Before Starting

  • Condition of Roof Materials: Inspect for signs of damage such as rot, leaks, or loose shingles.
  • Structural Integrity: Confirm the soundness of the underlying decking and supporting components.
  • Ventilation Systems: Ensure proper airflow to prevent moisture accumulation.
  • Weather Exposure: Identify areas prone to water intrusion or heavy wind exposure.

Conducting this initial evaluation allows professionals to identify challenges that may impact their approach and select appropriate solutions.

Selection of High-Quality Materials

  • Galvanized Steel Drip Edges: Rust-resistant for extended longevity.
  • Aluminum Flashing: Lightweight yet durable against harsh weather conditions.
  • Synthetic Underlayment: Provides an extra layer of protection under shingles.

By choosing premium materials, professionals enhance both the function and visual appeal of the finished roof.

Strategic Removal and Retroactive Adjustments

  1. Remove only what is necessary—such as shingles along eaves—minimizing disruption.
  2. Inspect underlying layers for hidden problems like water damage or mold growth.
  3. Make structural adjustments where needed to reinforce weak areas.

This strategic approach prevents unnecessary damage while ensuring a solid foundation for new installations like drip edges or flashing.

Precision Installation Methods

  • Slide the drip edge beneath existing shingles at eaves to direct water away from fascia boards.
  • Secure with nails spaced approximately 8–10 inches apart along the edge for maximum hold.
  • Ensure overlaps between sections are seamless (usually by 1–2 inches) to create a watertight barrier.

These steps demonstrate how careful attention during installation can significantly impact performance over time.

Post-Retrofit Inspection

  • Leak Testing: Check areas around newly installed features during rainfall simulation or hose testing.
  • Structural Checks: Confirm all fasteners are secure and no gaps remain between sections.
  • Aesthetic Review: Ensure visual consistency with surrounding roofing components.

A final inspection reassures clients that their roof has been upgraded with care and expertise.

man with hard hat standing on steps inspecting house roof A man with hard hat standing on steps inspecting house roof roofing contractors stock pictures, royalty-free photos & images

Benefits of Precision in Retrofitting

Benefit Description
Enhanced Durability Prevents premature wear caused by improper installations or subpar materials
Improved Weatherproofing Creates stronger barriers against rain, snow, wind, and debris
Increased Longevity Extends the life expectancy of the entire roofing system

This attention to detail translates into greater customer satisfaction and fewer follow-up problems for homeowners.

Roof retrofitting done with precision reflects not just technical skill but also a commitment to excellence—a hallmark trait every professional roofer strives for.

Essential Tips Every Roofer Should Know About Enhancing Roof Durability

Roof durability is one of the most critical aspects of maintaining a safe and long-lasting structure. For professional roofers, ensuring a roof’s lifespan and performance isn’t just about aesthetics or quick fixes—it’s about implementing effective techniques and using high-quality materials to protect the roof from wear, weather, and damage. Below are essential tips every roofer should consider when working on enhancing roof durability.

Use High-Quality Materials

One of the easiest ways to ensure a durable roof is by investing in quality materials. While premium options may come with higher upfront costs, their longevity often offsets any initial expenses over time.

  • Asphalt Shingles: Opt for architectural shingles over 3-tab for increased lifespan.
  • Metal Roofing: Choose materials with anti-corrosion coatings for better weather resistance.
  • Underlayment: Install moisture-resistant underlayment to prevent water damage and mold formation.
Material Type Durability (Average Lifespan) Maintenance Level
Architectural Shingles 30–50 years Low
Metal Roofing 40–70 years Moderate
Clay Tiles 50–100 years Low

Install Drip Edges Properly

Drip edges play an integral role in maintaining proper water drainage and preventing structural damage caused by water seepage. Ensure drip edges are installed beneath the first layer of shingles and extend over the fascia board for optimal performance.

Key benefits of proper drip edge installation:
– Prevents water infiltration along eaves and rakes.
– Protects fascia boards from rot or decay caused by pooling water.
– Supports shingles, reducing curling or cracking over time.

Regularly Inspect Flashing Areas

Flashing is critical for protecting vulnerable areas on a roof, such as valleys, chimneys, skylights, and vents. A small issue in flashing can lead to significant leaks if neglected.

Tips for proper flashing care:
1. Inspect flashing after extreme weather events (e.g., storms or heavy winds).
2. Replace damaged flashing promptly using corrosion-resistant metals such as aluminum or copper.
3. Seal flashing edges with roofing cement to prevent gaps or leaks.

Prioritize Attic Ventilation

A well-ventilated attic prevents excessive heat buildup during summer months while also reducing moisture accumulation during winter. Poor ventilation leads to shortened shingle lifespan and increased susceptibility to mold growth.

Signs of poor attic ventilation:
– Excessively warm ceilings in summer months. – Frost formation inside the attic during winter. – Warping or premature aging of wooden components within the attic space.

Solutions include:
– Installing ridge vents along peak points of the roof. – Adding soffit vents beneath eaves where intake airflow is required. – Using solar-powered exhaust fans if natural airflow isn’t sufficient.

Apply Proper Maintenance Practices

Even the most robust roofing systems require routine maintenance to perform optimally throughout their intended lifespan.

Key maintenance practices:
1. Cleaning Gutters: Ensure gutters are free from debris like leaves or twigs that may cause blockages and water overflow onto shingles. 2. Checking Shingle Integrity: Replace cracked, curled, or missing shingles immediately after spotting them. 3. Trimming Nearby Vegetation: Ensure no tree limbs hang too close; falling branches can damage roofing materials significantly. 4. Clearing Moss & Algae Growth: Use cleaning solutions that do not harm shingles but effectively remove biological growth that holds moisture against roofs.

Invest in Waterproofing Measures

Waterproofing agents such as silicone coatings help reinforce protection against extreme weather conditions like torrential rainstorms or snow melt-off periods.

Advantages include: – Extending overall performance longevity. – Filling small cracks unnoticed during visual inspections.

Consider waterproofing after five years post-installation for added support depending on regional climate demands.

By incorporating these essential tips into daily practice, professional roofers ensure enhanced resilience while safeguarding homeowners’ investments long term without compromising structural integrity.


Continue ReadingExpert Tips from a Roofing Repair Company Saint Michael Minnesota on Drip Edge Installation